LNMP
LNMP简介
LNMP代表的就是:Linux系统下Nginx+MySQL+PHP这种网站服务器架构。
GNU / Linux 操作系统:
Linux是一种类似Unix的计算机操作系统,Linux操作系统有很多个不同的发行版,如Red Hat 、SUSE 、FreeBSD、Debian、CentOS等。
Nginx服务器:
Nginx是一个小巧而高效的Linux下的Web服务器软件和反向代理服务器,也是一个IMAP/POP3/SMTP代理服务器。是由 Igor Sysoev 为俄罗斯访问量第二的 Rambler 站点开发的,已经在一些俄罗斯的大型网站上运行多年,相当的稳定。Nginx性能稳定、功能丰富、运维简单、处理静态文件速度快且消耗系统资源极少。
MySQL 类关系型数据库(RDBMS):是一个小型关系型数据库管理系统。
php编程语言:服务器端执行的嵌入HTML文档的脚本语言。
LNMP架构原理
客户端发送http request请求 ,服务器(Nginx)接受web请求;
Nginx判断客户端请求的资源是否为。若是静态请求,则Nginx直接将客户端请求的静态资源(.html, .htm .shtml等文件),通过Http response的形式传送给客户端;
若为php动态请求,则php脚本通过接口传输协议(网关协议)PHP-FCGI(fast-cgi)传输给PHP-FPM(进程管理程序)序,PHP-FPM不做处理,然后PHP-FPM调用PHP解析器进程,PHP解析器解析php脚本信息。
PHP在执行php请求时判断是否会依赖mysql数据库。若不依赖mysql数据库,则PHP-FPM不做处理,然后PHP-FPM调用PHP解析器进程,服务器再通过Http response的形式传送给浏览器,浏览器再进行解析与渲染然后进行呈现。
若依赖mysql数据库,则php程序通过php-mysql 驱动与mysql进行关联 ,获取相关数据 ,然后将其返还给php解释器 ,再次执行不依赖mysql数据库的流程。
Fast-CGI 介绍
cgi是通用网关接口,是外部应用程序与Web服务器之间的接口标准,cgi是为了保证web server传递过来的数据是标准格式的,方便cgi程序的编写者。
Fast-cgi像是一个常驻(long-live)型的cgi,是用来提高cgi程序性能的。
fast-CGI是nginx和php之间的一个通信接口,该接口实际处理过程通过启动php-fpm进程来解析php脚本,即php-fpm相当于一个动态应用服务器,从而实现nginx动态解析php。因此,如果nginx服务器需要支持php解析,需要在nginx.conf中增加php的配置;将php脚本转发到fastCGI进程监听的IP地址和端口(php-fpm.conf中指定)。同时,php安装的时候,需要开启支持fastCGI选项,并且编译安装php-fpm补丁/扩展,同时,需要启动php-fpm进程,才可以解析nginx通过fastCGI转发过来的php脚本。
Fast-CGI的工作原理
Web Server启动时载入Fast-CGI进程管理器(IIS ISAPI或PHP-FPM)
FastCGI进程管理器自身初始化,启动多个CGI解释器进程(可见多个php-cgi)并等待来自Web Server的连接。
当客户端请求到达Web Server时,Fast-CGI进程管理器选择并连接到一个CGI解释器。Web server将CGI环境变量和标准输入发送到Fast-CGI子进程php-cgi。
Fast-CGI子进程完成处理后将标准输出和错误信息从同一连接返回Web Server。当Fast-CGI子进程关闭连接时,请求便告处理完成。Fast-CGI子进程接着等待并处理来自Fast-CGI进程管理器(运行在Web Server中)的下一个连接。 在CGI模式中,php-cgi在此便退出了。
LNMP编译安装(应用于nginx与fastcgi安装在同一台的情况)
参考:https://www.logmm.org/lnmp_the_same_pc/ lnmp编译安装【同一机子上】
LNMP部署环境:
-
系统:Centos 6.6
-
软件:nginx-1.8.1+ mysql-5.5.61 + php-5.6.38
编译环境:安装LNMP相关依赖环境,包括"Server PlatForm Development" "Development tools",关闭selinux 和 iptables 功能,并配置epel yum源
实验目的:编译安装LAMP,通过php-fpm实现php与nginx链接 。
**一、配置编译环境 **
[root@test-6 ~]# yum groupinstall "Development tools" -y    # 安装包组开发工具
[root@test-6 ~]# yum groupinstall "Server Platform Development" -y    # 安装包组服务开发环境
[root@test-6 ~]# yum -y install gcc gcc-c++ autoconf pcre pcre-devel openssl openssl-devel zlib zlib-devel make automake

[root@test-6 ~]# vim /etc/selinux/config     # 修改配置文件,关闭selinux功能
SELINUX=disabled    # 设定为disabled
#SELINUXTYPE=targeted  # 注释该项,行首添加#
[root@ test-6 ~]# getenforce     # 验证selinux功能是否关闭
Disabled
[root@test-6 ~]# chkconfig iptables off    # 禁止开机自启动iptables功能
[root@test-6 ~]# service iptables stop    # 停止iptables 功能

[root@test-6 ~]# vim /etc/yum.repos.d/CentOS-Base.repo     # 配置epel源,添加如下内容
[epel]
name=CentOS-$releasever-Epel
baseurl=https://mirrors.aliyun.com/epel/6Server/x86_64/
gpgcheck=1
enabled=1
gpgkey=https://mirrors.aliyun.com/epel/RPM-GPG-KEY-EPEL-6Server

[root@test-6 ~]# yum clean all    # 清理yum缓存
Loaded plugins: fastestmirror, security
Cleaning repos: base epel extras updates
Cleaning up Everything
Cleaning up list of fastest mirrors

[root@test-6 ~]# yum repolist        # 查看yum源报告
二、编译安装Nginx(nginx-1.8)
- 编译安装pcre(pcre-8.37)
PCRE是一个Perl库,中文"Perl兼容的正则表达式库"。安装Nginx是为了使Nginx支持具备URI重写功能的rewrite模块,如果不安装pcre库,则Nginx无法使用rewrite模块功能,Nginx的Rewrite模块功能几乎是企业应用必须;
下载地址:https://ftp.pcre.org/pub/pcre/pcre-8.37.tar.bz2
[root@test-6 nginx]# tar xf pcre-8.37.tar.gz
[root@test-6 nginx]# cd pcre-8.37
[root@test-6 pcre-8.37]# ./configure --prefix=/usr/local/pcre
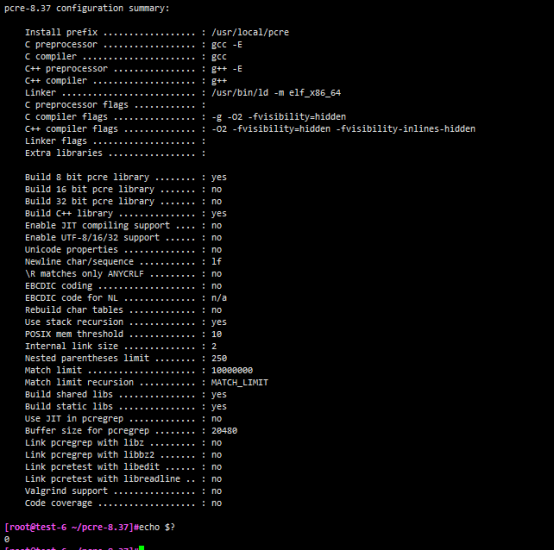
[root@test-6 pcre-8.37]# make && make install
- 编译安装zlib(zlib-1.2.11.tar.gz)
zlib 库提供了很多种压缩和解压缩的方式, nginx 使用 zlib 对 http 包的内容进行 gzip
下载地址: http://prdownloads.sourceforge.net/libpng/zlib-1.2.11.tar.gz?download
[root@test-6 nginx]# tar -xf zlib-1.2.11.tar.gz
[root@test-6 nginx]# cd zlib-1.2.11
[root@test-6 zlib-1.2.11]# ./configure --prefix=/usr/local/zlib
[root@test-6 zlib-1.2.11]# make && make install
- 编译安装openssl(openssl-1.0.2p.tar.gz)
OpenSSL 是一个强大的安全套接字层密码库,囊括主要的密码算法、常用的密钥和证书封装管理功能及 SSL 协议,并提供丰富的应用程序供测试或其它目的使用。 nginx 不仅支持 http 协议,还支持 https(即在ssl协议上传输http)。
下载地址:https://www.openssl.org/source/openssl-1.0.2p.tar.gz
[root@test-6 nginx]# tar -xf openssl-1.0.2o.tar.gz
[root@test-6 nginx]# cd openssl-1.0.2o
[root@test-6 openssl-1.0.2o]# ./config --prefix=/usr/local/openssl
[root@test-6 openssl-1.0.2o]# make && make install
- 编译安装nginx
下载地址:https://nginx.org/download/nginx-1.8.1.tar.gz
[root@test-6 nginx]# groupadd -r www
[root@test-6 nginx]# useradd -g www -s /sbin/nologin -r -M www    # 添加www用户
[root@test-6 nginx]# tar -xf nginx-1.8.1.tar.gz
[root@test-6 nginx]# cd nginx-1.8.1
[root@test-6 nginx-1.8.1]# ./configure \
--user=www \
--group=www \
--prefix=/usr/local/nginx \
--with-http_sub_module \
--with-http_stub_status_module \
--with-http_gzip_static_module \
--with-http_ssl_module \
--with-pcre=/usr/local/src/nginx/pcre-8.37 \
--with-zlib=/usr/local/src/nginx/zlib-1.2.11 \
--with-openssl=/usr/local/src/nginx/openssl-1.0.2o
注意:如果没有源码安装依赖包的就用这组参数:
./configure \
--user=www \
--group=www \
--prefix=/usr/local/nginx \
--conf-path=/etc/nginx/nginx.conf \
--sbin-path=/usr/sbin/nginx \
--with-http_sub_module \
--with-http_stub_status_module \
--with-http_gzip_static_module \
--with-http_ssl_module \
--with-pcre
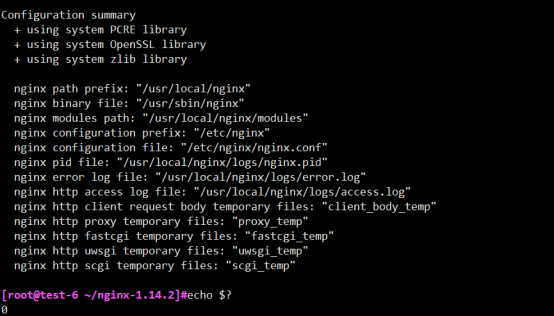
[root@test-6 nginx-1.8.1]# make && make install
到此,如果没有报错,nginx就可以正常运行了
[root@test-6 nginx-1.8.1]# cd /usr/local/nginx/

[root@test-6 nginx]# ls
conf  html  logs  sbin

[root@test-6 nginx]# vi /etc/profile.d/nginx.sh     # 配置环境变量
export PATH=/usr/local/nginx/sbin:$PATH

[root@test-6 conf]# ln -sv /usr/local/nginx/conf /etc/nginx   # 链接nginx配置文件
`/etc/nginx' -> `/usr/local/nginx/conf/'

[root@test-6 nginx-1.8.1]# mkdir /var/run/nginx    # 创建 nginx pid 文件目录

[root@test-6 nginx-1.8.1]# chown www.www /var/run/nginx    # 配置/var/run/nginx 文件属性

[root@test-6 conf]# vi /etc/nginx/nginx.conf     # 调整nginx配置文件
user  www www;    #  Nginx运行使用的用户为www
pid        /var/run/nginx/nginx.pid;    # 配置nginx.pid文件路径

[root@test-6 run]# nginx -t -c /etc/nginx/nginx.conf    # 确认配置文件格式及语法是否正确
nginx: the configuration file /etc/nginx/nginx.conf syntax is ok
nginx: configuration file /etc/nginx/nginx.conf test is successful
- 设置nginx服务启动脚本,启动Nginx服务并进行验证
[root@test-6 conf]# scp root@192.168.23.100:/etc/rc.d/init.d/nginx /etc/init.d/
# 从其他yum 安装nginx的服务器拷贝nginx 服务启动脚本到/etc/init.d 目录中
Nginx wiki网站已经有这个脚本(CentOS)http://wiki.nginx.org/RedHatNginxInitScript,稍做修改即可以用,在lnmp脚本已经运用
#!/bin/sh
#
# nginx - this script starts and stops the nginx daemon
#
# chkconfig:   - 85 15
# description:  NGINX is an HTTP(S) server, HTTP(S) reverse \
#               proxy and IMAP/POP3 proxy server
# processname: nginx
# config:      /etc/nginx/nginx.conf
# config:      /etc/sysconfig/nginx
# pidfile:     /var/run/nginx.pid

# Source function library.
. /etc/rc.d/init.d/functions

# Source networking configuration.
. /etc/sysconfig/network

# Check that networking is up.
[ "$NETWORKING" = "no" ] && exit 0

nginx="/usr/sbin/nginx"
prog=$(basename $nginx)

NGINX_CONF_FILE="/etc/nginx/nginx.conf"

[ -f /etc/sysconfig/nginx ] && . /etc/sysconfig/nginx

lockfile=/var/lock/subsys/nginx

make_dirs() {
   # make required directories
   user=`$nginx -V 2>&1 | grep "configure arguments:.*--user=" | sed 's/[^*]*--user=\([^ ]*\).*/\1/g' -`
   if [ -n "$user" ]; then
      if [ -z "`grep $user /etc/passwd`" ]; then
         useradd -M -s /bin/nologin $user
      fi
      options=`$nginx -V 2>&1 | grep 'configure arguments:'`
      for opt in $options; do
          if [ `echo $opt | grep '.*-temp-path'` ]; then
              value=`echo $opt | cut -d "=" -f 2`
              if [ ! -d "$value" ]; then
                  # echo "creating" $value
                  mkdir -p $value && chown -R $user $value
              fi
          fi
       done
    fi
}

start() {
    [ -x $nginx ] || exit 5
    [ -f $NGINX_CONF_FILE ] || exit 6
    make_dirs
    echo -n $"Starting $prog: "
    daemon $nginx -c $NGINX_CONF_FILE
    retval=$?
    echo
    [ $retval -eq 0 ] && touch $lockfile
    return $retval
}

stop() {
    echo -n $"Stopping $prog: "
    killproc $prog -QUIT
    retval=$?
    echo
    [ $retval -eq 0 ] && rm -f $lockfile
    return $retval
}

restart() {
    configtest || return $?
    stop
    sleep 1
    start
}

reload() {
    configtest || return $?
    echo -n $"Reloading $prog: "
    killproc $nginx -HUP
    RETVAL=$?
    echo
}

force_reload() {
    restart
}

configtest() {
  $nginx -t -c $NGINX_CONF_FILE
}

rh_status() {
    status $prog
}

rh_status_q() {
    rh_status >/dev/null 2>&1
}

case "$1" in
    start)
        rh_status_q && exit 0
        $1
        ;;
    stop)
        rh_status_q || exit 0
        $1
        ;;
    restart|configtest)
        $1
        ;;
    reload)
        rh_status_q || exit 7
        $1
        ;;
    force-reload)
        force_reload
        ;;
    status)
        rh_status
        ;;
    condrestart|try-restart)
        rh_status_q || exit 0
            ;;
    *)
        echo $"Usage: $0 {start|stop|status|restart|condrestart|try-restart|reload|force-reload|configtest}"
        exit 2
esac
[root@test-6 conf]# vi /etc/init.d/nginx         # 修改nginx服务启动脚本
...
nginx="/usr/local/nginx/bin/nginx"    # 指定nginx命令路径
lockfile="/var/lock/nginx"    # 指定nginx lockfile文件
pidfile="/var/run/nginx/${prog}.pid"    # 指定nginx 启动pid文件路径
NGINX_CONF_FILE="/etc/nginx/nginx.conf"    # 指定配置脚本nginx.conf 文件路径

[root@test-6 nginx]# chkconfig --add nginx    # 设置添加到chkconfig 列表

[root@test-6 nginx]# chkconfig nginx on    # 设置开机自动启动

[root@test-6 nginx]# service nginx start    # nginx服务启动
Starting nginx:                                            [  OK  ]

[root@test-6 nginx]# ss -tunlp | grep nginx
tcp    LISTEN     0      128        *:80          *:*      users:(("nginx",11893,6),("nginx",11895,6))

[root@test-6 nginx]# ps aux | grep nginx    # 验证nginx服务 ,root角色启动主进程 ,www角色启动worker proess进程
root     11893  0.0  0.0  17996   836 ?        Ss   13:32   0:00 nginx: master process /usr/local/nginx/sbin/nginx -c /etc/nginx/nginx.conf
www      11895  0.0  0.0  18448  1812 ?        S    13:32   0:00 nginx: worker process
root     11915  0.0  0.0 103328   848 pts/0    S+   13:33   0:00 grep nginx

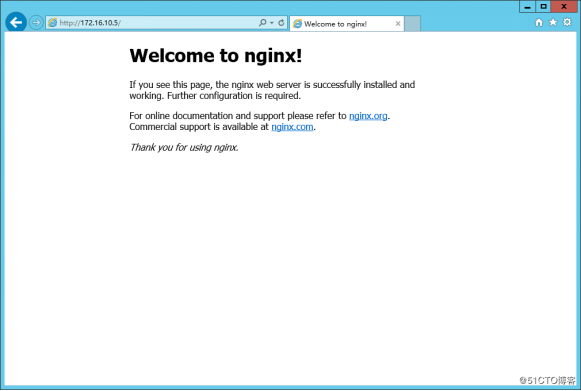
[root@test-6 nginx]# curl -I http://localhost    # 验证nginx 运行状态
HTTP/1.1 200 OK
Server: nginx/1.8.1
三、编译安装Mysql(mysql-5.5.61)
- 建议在硬
raid中创建lvm并使用独立的lvm磁盘作为mysql 数据存储目录 ,便于备份mysql数据
[root@test-6 ~]# pvs    # 查看磁盘剩余空间
  PV         VG   Fmt  Attr PSize   PFree
  /dev/sda2  vg0  lvm2 a--u 439.45g 92.77g

[root@test-6 ~]# vgs    # 查看磁盘剩余空间
  VG   #PV #LV #SN Attr   VSize   VFree
  vg0    1   6   0 wz--n- 439.45g 92.77g

[root@test-6 ~]# lvcreate -n data -L 50G vg0    # 创建lvm分区data ,大小为50G
  Logical volume "data" created.

[root@test-6 ~]# lvs    # 查看创建的lvm分区
  LV    VG   Attr       LSize   Pool Origin Data%  Meta%  Move Log Cpy%Sync Convert
  data  vg0  -wi-a-----  50.00g

[root@test-6 ~]# mke2fs -t ext4 /dev/mapper/vg0-data    # 格式化分区/dev/sda4
mke2fs 1.41.12 (17-May-2010)
Filesystem label=
OS type: Linux

Writing inode tables: done
Creating journal (32768 blocks): done
Writing superblocks and filesystem accounting information: done

This filesystem will be automatically checked every 34 mounts or
180 days, whichever comes first.  Use tune2fs -c or -i to override.

[root@test-6 ~]# mount /dev/mapper/vg0-data  /data/

[root@test-6 ~]# mkdir /data    # 创建目录,做挂载目录用途

[root@VM ~]# vi /etc/fstab  # 配置开机自动挂载/dev/mapper/vg0-data 分区
/dev/mapper/vg0-data    /data                   ext4    defaults        1 2

[root@VM ~]# mount -a    # 挂载所有分区

[root@test-6 ~]# mount  | grep data    # 查看验证lvm分区挂载
/dev/mapper/vg0-data on /data type ext4 (rw)
- 编译安装mysql
下载地址:https://mirrors.163.com/mysql/Downloads/MySQL-5.5/mysql-5.5.61.tar.gz
[root@test-6 mysql]# groupadd mysql -r    # 添加mysql组

[root@test-6 mysql]# useradd -s /sbin/nologin -g mysql  mysql    # 添加系统用户mysql

[root@test-6 mysql]# id mysql    # 查看mysql用户
uid=498(mysql) gid=498(mysql) groups=498(mysql)

[root@test-6 mysql]# mkdir /data/sqldata /var/run/mysql /var/lock/mysql  # 创建mysql数据的目录/data/sqldata,pid目录/var/run/mysql ,lock目录/var/lock/mysql

[root@test-6 mysql]# chown mysql.mysql /var/run/mysql/ /var/lock/mysql/ /data/sqldata/   # 必须调整目录权限属主、属组为mysql,这样才有写的权限

[root@test-6 mysql]# tar -xf mysql-5.5.61.tar.gz   # 解压mysql源码包

[root@test-6 mysql]# cd mysql-5.5.61   # 编译安装mysql

[root@test-6 mysql-5.5.61]# yum install cmake    # 安装cmake命令功能

[root@test-6 mysql-5.5.61]# cmake . \
-DCMAKE_INSTALL_PREFIX=/usr/local/mysql  \
-DMYSQL_DATADIR=/data/sqldata   \
-DSYSCONFDIR=/etc \
-DWITH_MYISAM_STORAGE_ENGINE=1 \
-DWITH_INNOBASE_STORAGE_ENGINE=1 \
-DWITH_ARCHIVE_STORAGE_ENGINE=1 \
-DWITH_MEMORY_STORAGE_ENGINE=1 \
-DMYSQL_UNIX_ADDR=/var/lock/mysql/mysql.sock \
-DMYSQL_TCP_PORT=3306 \
-DWITH_PARTITION_STORAGE_ENGINE=1  \
-DEXTRA_CHARSETS=all \
-DDEFAULT_CHARSET=utf8 \
-DDEFAULT_COLLATION=utf8_general_ci \
-DWITH_DEBUG=0

[root@test-6 mysql-5.5.61]# make && make install

[root@test-6 mysql-5.5.61]# vim /etc/profile.d/mysql.sh    # 配置mysql环境变量
export PATH=/usr/local/mysql/bin:$PATH
source /etc/profile.d/mysql.sh
[root@test-6 mysql-5.5.61]# . /etc/profile.d/mysql.sh    # 使能环境变量

[root@test-6 mysql-5.5.61]# ln -sv /usr/local/mysql/include/ /usr/include/mysql    # 配置mysql include头文件
`/usr/include/mysql' -> `/usr/local/mysql/include/'

[root@test-6 mysql-5.5.61]# vim /etc/man.config     # 配置mysql命令帮助文件
MANPATH /usr/local/mysql/man

[root@test-6 mysql-5.5.61]# vim /etc/ld.so.conf.d/mysql.conf    # 配置mysql lib库,添加如下项
/usr/local/mysql/lib

[root@test-6 mysql-5.5.61]# ldconfig -v | grep mysql    # 验证lib库
/usr/local/mysql/lib:
    libmysqlclient.so.18 -> libmysqlclient_r.so.18.0.0
/usr/lib64/mysql:
    libmysqlclient_r.so.16 -> libmysqlclient_r.so.16.0.0
    libmysqlclient.so.16 -> libmysqlclient.so.16.0.0
- mysql初始化,启动服务
[root@test-6 ~]# cd /usr/local/mysql/

[root@test-6 mysql]#./scripts/mysql_install_db --user=mysql --basedir=/usr/local/mysql --datadir=/data/sqldata/   # 初始化mysql脚本

[root@test-6 mysql]# cp support-files/my-large.cnf /etc/my.cnf    # 复制启动脚本配置文件
cp: overwrite `/etc/my.cnf'? y

[root@test-6 mysql]# vim /etc/my.cnf     # 调整mysql启动配置文件
[client]
#password       = your_password
port            = 3306    # 指定端口
socket          = /var/lock/mysql/mysql.sock    # 指定sock文件路径
#重点:这两个socket的路径必须完全一样,否则无法启动
#   pid-file与socket非常重要,直接影响是否能启动服务
# Here follows entries for some specific programs

# The MySQL server

[mysqld]
port            = 3306
socket          = /var/lock/mysql/mysql.sock    # 指定sock文件
pid-file        = /var/run/mysql/mysql.pid    # 指定pid目录
datadir         = /data/sqldata/    # 指定数据存储目录

[root@test-6 mysql]# cp support-files/mysql.server /etc/init.d/mysqld    # 复制mysqld启动脚本文件

[root@test-6 mysql]# vi /etc/init.d/mysqld     # 配置mysqld启动脚本
basedir=/usr/local/mysql    # 指定mysql安装目录
datadir=/data/sqldata    # 指定数据存储目录


[root@test-6 mysql]# chkconfig --add mysqld    # 加入mysqld启动服务

[root@test-6 mysql]# chkconfig mysqld on

[root@test-6 mysql]# service mysqld start    # 启动mysqld服务
Starting MySQL SUCCESS!

[root@test-6 mysql]# ss -tunl | grep 3306
tcp    LISTEN     0      50                     *:3306                  *:*

[root@test-6 mysql]# /etc/init.d/mysqld start       (报错)
Starting MySQL.. ERROR! The server quit without updating PID file (/var/run/mysql.pid).
解决分析:socket与pid所在的文件没有权限且所属组、主不是mysql用户
- 对mysql数据库进行管理,删除匿名用户,创建密码 ,删除test数据库 等操作
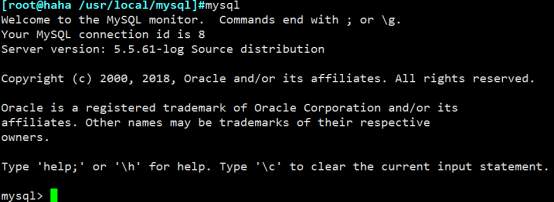
[root@test-6 data]# mysql    # 登录mysql 数据库
elcome to the MySQL monitor.  Commands end with ; or \g.
Your MySQL connection id is 1
Server version: 5.5.61-log Source distribution

mysql> drop database test;    -- 删除test数据库
Query OK, 0 rows affected (0.03 sec)

mysql> show databases;    -- 显示数据库
+--------------------+
| Database           |
+--------------------+
| information_schema |
| mysql              |
| performance_schema |
+--------------------+
3 rows in set (0.00 sec)

mysql> use mysql;    -- 切换到mysql 数据库
Database changed

mysql> select user,host,password from user;
+------+-----------+----------+
| user | host      | password |
+------+-----------+----------+
| root | localhost |          |
| root | test-6    |          |
| root | 127.0.0.1 |          |
| root | ::1       |          |
|      | localhost |          |
|      | test-6    |          |
+------+-----------+----------+
6 rows in set (0.00 sec)
mysql> drop user root@'::1';    -- 清理匿名用户
Query OK, 0 rows affected (0.00 sec)

mysql> drop user ''@'localhost';
Query OK, 0 rows affected (0.00 sec)

mysql> drop user ''@'test-6';
Query OK, 0 rows affected (0.00 sec)

mysql> UPDATE user SET password=PASSWORD('666666') WHERE user='root';   -- 定义root用户密码
Query OK, 4 rows affected (0.01 sec)
Rows matched: 4  Changed: 4  Warnings: 0

mysql> flush privileges;
Query OK, 0 rows affected (0.00 sec)
- 对mysql 创建用户及密码、主机配置文件,可以不使用密码进行登录
[root@VM mysql]# vim /root/.my.cnf    # 添加如下代码,实现无需密码进行登录
[mysql]
user=root
host=localhost
password=Hello123abc.com
注:在启动MySQL服务时,会按照一定次序搜索my.cnf。
寻找顺序:/etc/my.cnf ->$MYSQL_Base/my.cnf -> --defaults-extra-file=/path/to/some_my.cnf ->.my.cnf
直接登录
四、编译安装PHP(php-5.5.38)
PHP 通过 PHP-FPM(FastCGI进程管理器)可以很好地与 Nginx 协同工作。PHP-FPM 针对不同规模的网站功能和性能都非常优良,尤其是高并发大型网站。
PHP-FPM是一个实现了Fastcgi的程序,PHP-FPM的管理对象是php-cgi。 后来PHP内核集成了PHP-FPM之后就方便多了,使用--enalbe-fpm这个编译参数即可。
- 编译安装php
网页下载地址:http://am1.php.net/get/php-5.5.38.tar.gz/from/this/mirror
# 配置epel yum源,安装依赖环境
# yum install -y epel-release
两个不能一起安装,因为CentOs6默认的yum源没有 libmcrypt-devel这个包,只能借助epel的yum源,所以先安装epel,再安装(如果之前配置了epel源,就基本不会报错)
[root@test-6 php]# yum -y install gcc libxml2-devel openssl-devel openssl bzip2-devel libmcrypt libmcrypt-devel mcrypt libpng freetype-devel php-mcrypt libjpeg-devel libpng-devel

[root@test-6 php]# tar xf php-5.5.38.tar.gz

[root@test-6 php]# cd php-5.5.38

[root@test-6 php-5.5.38]# ./configure \
--prefix=/usr/local/php   \
--with-mysql=/usr/local/mysql \
--enable-fpm \ # 开启fpm
--with-mysqli=/usr/local/mysql/bin/mysql_config \ #(不在同一台就不需要写路径)
--with-config-file-path=/etc \
--with-openssl \
--with-config-file-scan-dir=/etc/php.d \
--with-freetype-dir \
--with-libxml-dir=/usr \
--with-jpeg-dir \
--with-png-dir \
--with-zlib \
--with-bz2 \
--with-mcrypt \
--with-gd \
--with-gettext  \
--enable-sockets  \
--enable-xml \
--enable-bcmath \
--enable-mbstring
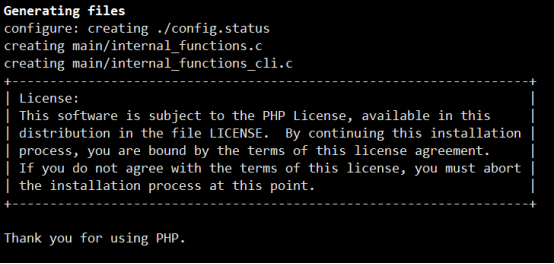
报错:
configure: error: Cannot find MySQL header files under /usr/lib64/mysql.
Note that the MySQL client library is not bundled anymore!
这是由于安装mysql时没有安装mysql头文件,或者是路径指定不正确,php找不到mysql的头文件引起的错误提示
解决方法1:
1. 查看你的系统有没有安装mysql header
   find / -name mysql.h
  如果有。请指定 --with-mysql=/ 跟你的正常路径。如果没有。请看下一步。
2.redhat安装
  rpm -ivh MySQL-devel-4.1.12-1.i386.rpm
3.debian安装
  apt-get install libmysqlclient15-dev
4.最后一步php的配置选项添加--with-mysql=/usr即可
解决方法2:
直接--with-mysql就不跟路径
[root@test-6 php-5.5.38]# make && make install
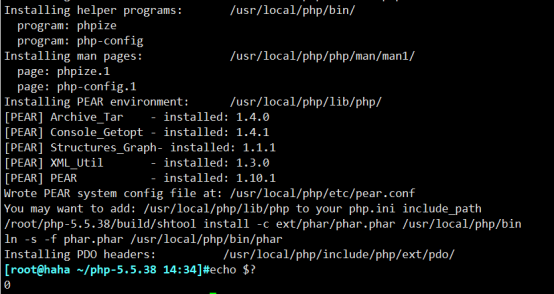
注:make的时候如果报错,那么就在后面加上参数,再试试看。
# make ZEND_EXTRA_LIBS='-liconv'
# make install
[root@test-6 php-5.5.38]# vim /etc/profile.d/php.sh     #添加环境变量
export PATH=/usr/local/php/bin:/usr/local/php/sbin:$PATH

[root@VM ~]# ln -sv /usr/local/php/include/ /usr/include/php    # 添加php-fpm头文件
`/usr/include/php' -> `/usr/local/php/include/'

[root@test-6 php-5.5.38]# cp php.ini-production /etc/php.ini   # 拷贝php.ini配置文件(是在解压包里面拷贝过来的)

优化参数:
        expose_php = Off                //隐藏PHP版本信息
        display_errors                  //显示php的错误信息
        cgi.fix_pathinfo=0   #在 php.ini 中设置,它是用来对设置cgi模式下为php是否提供绝对路径信息或PATH_INFO信息;这会让 PHP 解释器只尝试给定的文件路径,如果没有找到这个文件就停止处理------->配合nginx使用
[root@test-6 php-5.5.38]# cp sapi/fpm/php-fpm.conf /etc/php-fpm.conf    # 拷贝php-fpm 配置文件(是在解压包里面拷贝过来的;或者在安装目录里面etc下面)

[root@test-6 php-5.5.38]# vim /etc/php-fpm.conf     # 调整php-fpm.conf 配置文件
[global]
pid = /usr/local/php/var/run/php-fpm.pid    # 指定pid 文件路径
error_log = /usr/local/php/var/log/php-fpm.log    # 指定错误日志log 路径
说明:这里最好写php安装目录下的var目录下面,这样就不用修改启动脚本
修改:配置nginx支持PHP:
user = nginx
group = nginx
注意:默认情况下,nginx安装完成后,仅仅只支持apache,需要修改其属主、属组
去掉这两行的注释,然后确认路劲是否正确;并且把用户与组改为nginx,表示有nginx用户调用
其他优化参数:

下面参数的意思分别为:要求:pm.min_spare_servers <= pm.start_servers <= pm.max_spare_servers
    pm = dynamic 如何控制子进程,选项有static和dynamic
    pm.max_children:静态方式下开启的php-fpm进程数量
    pm.max_requests:php-fpm子进程能处理的最大请求数
    pm.start_servers:动态方式下的起始php-fpm进程数量
    pm.min_spare_servers:动态方式下的最小php-fpm进程数
    pm.max_spare_servers:动态方式下的最大php-fpm进程数量
区别: 如果dm设置为 static,那么其实只有pm.max_children这个参数生效。系统会开启设置数量的php-fpm进程。如果dm设置为 dynamic,那么pm.max_children参数失效,后面3个参数生效,系统会在php-fpm运行开始的时候启动pm.start_servers个php-fpm进程,然后根据系统的需求动态在pm.min_spare_servers和pm.max_spare_servers之间调整php-fpm进程数
https://www.cnblogs.com/pansidong/p/11179618.html
https://segmentfault.com/a/1190000015612563
https://blog.csdn.net/qq_32352565/article/details/79255765
1.通过命令查看服务器上一共开了多少的 php-cgi 进程
ps -fe |grep "php-fpm"|grep "pool"|wc -l

2.查看已经有多少个php-cgi进程用来处理tcp请求
netstat -anp|grep "php-fpm"|grep "tcp"|grep "pool"|wc -l

3.linux+nginx+php环境中,每个php-fpm进程的内存限制
设置方法:编辑php-fpm.conf配置文件
php_admin_value[memory_limit] = 128M(我服务器上的配置文件在/etc/php5/fpm/pool.d/www.conf 这个文件是被包含在php-fpm.conf里的) 后边的数字可以随便更改:32M,64M,128M,256M,512M,这个设置可根据你的服务器内存大小和你的需求来写,修改后要加载一下php-fpm服务

-1 //表示没有内存限制
原文链接:https://blog.csdn.net/leeslee_feng/article/details/46823553
1、phpinfo()函数,
PHP文件中执行phpinfo()函数,提供参数时可查看特定配置

2、 php -i       # 查看php參數
与phpinof()相似,是在命令行中执行。加上 | grep configure,可查看编译参数。

3、php -m
查看PHP开启的扩展模块,Linux、Windows中都可以用。

4、php --ini
查看加载的配置文件信息
=====================================================================
listen = 127.0.0.1:9000     #php-fpm的监听端口/也可以写sock文件,这里写什么,必须在nginx里面对应上
pm = static
pm.max_children = 50        #表示fpm模块的最大进程数[静态启动方式设置]
pm.start_servers = 20       #启动时开启的进程数[动态启动方式设置]
pm.min_spare_servers = 5    #最小空闲进程数
pm.max_spare_servers = 20   #最大空闲进程数
listen.owner = nobody
listen.group = nobody
listen.mode = 0660          #设置fpm的权限
listen.allowed_clients = 127.0.0.1      #允许哪些客户端连接fpm;[ln/amp平台不在一台服务器上必须改]
pm.max_requests = 500               #fpm最大支持的请求数量为多少;若设置为0,跟当前的系统资源有关

pid = run/php-fpm.pid
#pid设置,默认在安装目录中的var/run/php-fpm.pid,建议开启

error_log = log/php-fpm.log
#错误日志,默认在安装目录中的var/log/php-fpm.log

log_level = notice
#错误级别. 可用级别为: alert(必须立即处理), error(错误情况), warning(警告情况), notice(一般重要信息), debug(调试信息). 默认: notice.

emergency_restart_threshold = 60
emergency_restart_interval = 60s
#表示在emergency_restart_interval所设值内出现SIGSEGV或者SIGBUS错误的php-cgi进程数如果超过 emergency_restart_threshold个,php-fpm就会优雅重启。这两个选项一般保持默认值。

process_control_timeout = 0
#设置子进程接受主进程复用信号的超时时间. 可用单位: s(秒), m(分), h(小时), 或者 d(天) 默认单位: s(秒). 默认值: 0.

daemonize = yes
#后台执行fpm,默认值为yes,如果为了调试可以改为no。在FPM中,可以使用不同的设置来运行多个进程池。 这些设置可以针对每个进程池单独设置。

listen = 127.0.0.1:9000
#fpm监听端口,即nginx中php处理的地址,一般默认值即可。可用格式为: 'ip:port', 'port', '/path/to/unix/socket'. 每个进程池都需要设置.

listen.backlog = -1
#backlog数,-1表示无限制,由操作系统决定,此行注释掉就行。backlog含义参考:http://www.3gyou.cc/?p=41

listen.allowed_clients = 127.0.0.1
#允许访问FastCGI进程的IP,设置any为不限制IP,如果要设置其他主机的nginx也能访问这台FPM进程,listen处要设置成本地可被访问的IP。默认值是any。每个地址是用逗号分隔. 如果没有设置或者为空,则允许任何服务器请求连接

listen.owner = www
listen.group = www
listen.mode = 0666
#unix socket设置选项,如果使用tcp方式访问,这里注释即可。

user = www
group = www
#启动进程的帐户和组

pm = dynamic #对于专用服务器,pm可以设置为static。
#如何控制子进程,选项有static和dynamic。如果选择static,则由pm.max_children指定固定的子进程数。如果选择dynamic,则由下开参数决定:
pm.max_children #,子进程最大数
pm.start_servers #,启动时的进程数
pm.min_spare_servers #,保证空闲进程数最小值,如果空闲进程小于此值,则创建新的子进程
pm.max_spare_servers #,保证空闲进程数最大值,如果空闲进程大于此值,此进行清理

pm.max_requests = 1000
#设置每个子进程重生之前服务的请求数. 对于可能存在内存泄漏的第三方模块来说是非常有用的. 如果设置为 '0' 则一直接受请求. 等同于 PHP_FCGI_MAX_REQUESTS 环境变量. 默认值: 0.

pm.status_path = /status
#FPM状态页面的网址. 如果没有设置, 则无法访问状态页面. 默认值: none. munin监控会使用到

ping.path = /ping
#FPM监控页面的ping网址. 如果没有设置, 则无法访问ping页面. 该页面用于外部检测FPM是否存活并且可以响应请求. 请注意必须以斜线开头 (/)。

ping.response = pong
#用于定义ping请求的返回相应. 返回为 HTTP 200 的 text/plain 格式文本. 默认值: pong.

request_terminate_timeout = 0
#设置单个请求的超时中止时间. 该选项可能会对php.ini设置中的'max_execution_time'因为某些特殊原因没有中止运行的脚本有用. 设置为 '0' 表示 'Off'.当经常出现502错误时可以尝试更改此选项。

request_slowlog_timeout = 10s
#当一个请求该设置的超时时间后,就会将对应的PHP调用堆栈信息完整写入到慢日志中. 设置为 '0' 表示 'Off'

slowlog = log/$pool.log.slow
#慢请求的记录日志,配合request_slowlog_timeout使用

rlimit_files = 1024
#设置文件打开描述符的rlimit限制. 默认值: 系统定义值默认可打开句柄是1024,可使用 ulimit -n查看,ulimit -n 2048修改。

rlimit_core = 0
#设置核心rlimit最大限制值. 可用值: 'unlimited' 、0或者正整数. 默认值: 系统定义值.

chroot =
#启动时的Chroot目录. 所定义的目录需要是绝对路径. 如果没有设置, 则chroot不被使用.

chdir =
#设置启动目录,启动时会自动Chdir到该目录. 所定义的目录需要是绝对路径. 默认值: 当前目录,或者/目录(chroot时)

catch_workers_output = yes
#重定向运行过程中的stdout和stderr到主要的错误日志文件中. 如果没有设置, stdout 和 stderr 将会根据FastCGI的规则被重定向到 /dev/null . 默认值: 空.
[root@test-6 php-5.5.38]# cp sapi/fpm/init.d.php-fpm /etc/init.d/php-fpm    # 拷贝php-fpm 启动脚本文件

sbin]# ./php-fpm -t         #检查配置文件是否正确
[29-Jan-2021 22:41:22] NOTICE: configuration file /usr/local/php/etc/php-fpm.conf test is successful

[root@test-6 php-5.5.38] #chmod --reference=/etc/init.d/iptables /etc/init.d/php-fpm     # 修改启动脚本权限

[root@test-6 php-5.5.38]# vim /etc/init.d/php-fpm     # 修改php-fpm启动脚本文件->注意:这里必须填正确,安装你安装的路径填写
#! /bin/sh
prefix=/usr/local/php   #确认安装位置是否正确
exec_prefix=${prefix}

php_fpm_BIN=${exec_prefix}/sbin/php-fpm #php-fpm二进制文件位置
php_fpm_CONF=${exec_prefix}/etc/php-fpm.conf    # 指定php-fpm conf 路径
php_fpm_PID=${exec_prefix}/var/run/php-fpm.pid    # 指定php-fpm.pid 路径
[root@test-6 php-5.5.38]# chkconfig --add php-fpm

[root@test-6 php-5.5.38]# chkconfig php-fpm on

[root@test-6 php-5.5.38]# service php-fpm start
Starting php-fpm  done

[root@test-6 php-5.5.38]# ss -tunl |grep 9000
Netid State      Recv-Q Send-Q                        Local Address:Port                          Peer Address:Port
tcp   LISTEN     0      128                               127.0.0.1:9000                                     *:*
- 配置nginx支持php
[root@test-6 html]# vim /etc/nginx/nginx.conf
    server {
        listen       80;
        server_name  localhost;
        #charset koi8-r;
        #access_log  logs/host.access.log  main;
        location / {
            root   html;        #如果找不到页面,就改成绝对路径
            index  index.html index.htm index.php;    # 该项添加index.php,如果添加到第一的位置,则直接访问IP就是访问的php页面。
        }
        location ~ \.php$ {    #取消该段内容反向解析的注释
            root           /usr/local/nginx/html;   #如果解析不出来,这个地方要改下下,改成绝对路径
            fastcgi_pass   127.0.0.1:9000;  # fastcgi监听端口
            fastcgi_index  index.php;   #和访问文件名相同
            fastcgi_param  SCRIPT_FILENAME  $document_root$fastcgi_script_name;    # 把$Scripts 调整为$document_root                # fastcgi.conf文件位置
            include        fastcgi_params;
        }
$document_root 代表当前请求在root指令中指定的值:
上面配置中的$document_root就是针对/usr/local/nginx/html目录下的php文件进行解析
或者写成:
location ~ \.php$ {
            root           /usr/local/nginx/html;#其实与FastCGI无关
            fastcgi_pass   127.0.0.1:9000;#这里是套接字连接方式不用更改。如果是Unix文件描述符连接方式就需要更改,例如:fastcgi_pass unix:/var/run/php/php7.0-fpm.sock;
            fastcgi_index  index.php;#制定了fastcgi的主页是index.php
       #    fastcgi_param  SCRIPT_FILENAME  /scripts$fastcgi_script_name;注释该句
       #    include        fastcgi_params;注释该句
            include        fastcgi.conf;    #(添加一句)
        }
参数解释:Nginx官方包自带配置分析
注:Nginx官方包来自:http://nginx.org/en/linux_packages.html#stable 我们先用Nginx官方打的包来举例,如果懒得安装可以直接在github上看:https://github.com/nginx/nginx/tree/master/conf。 可以看到,在Nginx主配置文件nginx.conf(https://github.com/nginx/nginx/blob/master/conf/nginx.conf),Server段中与PHP交互相关部分在:
    # proxy the PHP scripts to Apache listening on 127.0.0.1:80
    #
    #location ~ \.php$ {
    #    proxy_pass   http://127.0.0.1;
    #}

    # pass the PHP scripts to FastCGI server listening on 127.0.0.1:9000
    #
    #location ~ \.php$ {
    #    root           html;
    #    fastcgi_pass   127.0.0.1:9000;
    #    fastcgi_index  index.php;
    #    fastcgi_param  SCRIPT_FILENAME  /scripts$fastcgi_script_name;
    #    include        fastcgi_params;
    #}
通过注释可以看到,上面一段是Nginx反代Apache+PHP的时候用的,下面这段使我们真正需要分析的。
第一句location ~ \.php$很简单,~表示大小写区分的正则匹配,如果对Nginx匹配规则不清楚的推荐阅读Nginx官方文档和这篇文章。后面的.php$匹配了所有结尾是.php的URI。
这里其实有个需要注意的地方。我们在使用很多PHP框架或自己写PHP的时候,经常会使用index.php做路由,便会出现类似于index.php/foo/bar这种URI,显然,这样的URI是匹配不到.php$的,我们可以将匹配规则改为:
location ~ .*\.php(\/.*)*$
第二行root html;其实与FastCGI无关,如果往上翻翻就可以发现他并没有把root写在server段,而是写在了每个location段,这里只是指定下根目录位置。在Debian的默认配置中,root参数是直接写在server段的,所以就不需要在这里再次指定root参数了。
第三行fastcgi_pass便是制定Nginx去哪找到FastCGI服务器的Master进程。套接字连接方式不用修改。Debian下安装好php-fpm后默认就是Unix文件描述符连接方式。这里写为
fastcgi_pass unix:/var/run/php/php7.0-fpm.sock; # Debian 9 PHP 7.0
或
fastcgi_pass unix:/var/run/php5-fpm.sock; # Debian 7/8 PHP 5.x
从PHP7.*开始,文件描述符会放在/var/run/php下,并会显示出小数点后一位版本号,意味着Debian 10如果带的是PHP7.3版本(99%可能性),就可以写为
fastcgi_pass unix:/var/run/php/php7.3-fpm.sock;
第四行fastcgi_index制定了fastcgi的主页是index.php,无须解释。
第五行就很有点意思了。我们连带第六行一起说。第六行引入了一个新文件fastcgi_params,我们将fastcgi_params的内容也贴在下面:
fastcgi_param  QUERY_STRING       $query_string;
fastcgi_param  REQUEST_METHOD     $request_method;
fastcgi_param  CONTENT_TYPE       $content_type;
fastcgi_param  CONTENT_LENGTH     $content_length;

fastcgi_param  SCRIPT_NAME        $fastcgi_script_name;
fastcgi_param  REQUEST_URI        $request_uri;
fastcgi_param  DOCUMENT_URI       $document_uri;
fastcgi_param  DOCUMENT_ROOT      $document_root;
fastcgi_param  SERVER_PROTOCOL    $server_protocol;
fastcgi_param  REQUEST_SCHEME     $scheme;
fastcgi_param  HTTPS              $https if_not_empty;

fastcgi_param  GATEWAY_INTERFACE  CGI/1.1;
fastcgi_param  SERVER_SOFTWARE    nginx/$nginx_version;

fastcgi_param  REMOTE_ADDR        $remote_addr;
fastcgi_param  REMOTE_PORT        $remote_port;
fastcgi_param  SERVER_ADDR        $server_addr;
fastcgi_param  SERVER_PORT        $server_port;
fastcgi_param  SERVER_NAME        $server_name;

# PHP only, required if PHP was built with --enable-force-cgi-redirect
fastcgi_param REDIRECT_STATUS 200;
可以看到,第六行引入的这个文件和第五行一样都是以fastcgi_param打头。fastcgi_param用于指定Nginx将文件传入FastCGI Server时的各种参数使用的。如第五行
fastcgi_param SCRIPT_FILENAME /scripts$fastcgi_script_name;
说明了要传入的文件是/scripts/下的具体php文件名,这就使得FastCGI Server会去/scripts目录下找这个php文件。如果你的php文件其实不在这个目录下(比如网站根目录下),FastCGI Server其实根本找不到。所以我们必须把/scripts改成和root参数一样的实际网站根目录。一段时间后Nginx官方也发现这个参数太不方便了,提供了一个$document_root参数指向当前网站根目录,所以我们可以改成:
fastcgi_param SCRIPT_FILENAME $document_root$fastcgi_script_name;
Nginx顺便还提供了一个包括了这个参数的新的fastcgi_params文件重命名为fastcgi.conf:https://github.com/nginx/nginx/blob/master/conf/fastcgi.conf。但由于兼容性原因和历史包袱,保留了nginx.conf的写法和fastcgi_params文件,实际上,我们大可以将第五六行
        #    fastcgi_param  SCRIPT_FILENAME  /scripts$fastcgi_script_name;
        #    include        fastcgi_params;
# 直接改成
            include        fastcgi.conf;
[root@test-6 html]# service nginx restart
Stopping nginx:                                            [  OK  ]
Starting nginx:                                            [  OK  ]

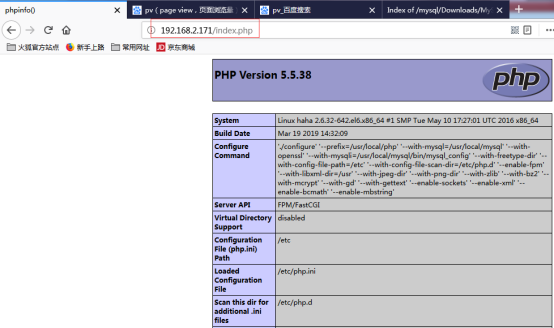
[root@test-6 html]# vim /usr/local/nginx/html/index.php     # php 测试
<?php
        phpinfo ();
?>

[root@test-6 html]# curl -I http://localhost/index.php    # 验证php启动
HTTP/1.1 200 OK
Server: nginx/1.8.1
或者网页访问:
- 验证php功能与nginx ,php与mysql 连接
参考:https://blog.csdn.net/zhoucheng05_13/article/details/75082722
[root@VM ~]# vim /usr/local/nginx/html/php-mysql.php    # 测试nginx 与 php 连接状态脚本,php与mysql 连接
<?php
        $link = mysql_connect('localhost','root','666666');
if ($link)
        echo "sucessful.";
else
        echo "failure.";
mysql_close();
phpinfo();
?>
进入mysql,对root用户,在localhost主机上进行授权
mysql> GRANT ALL PRIVILEGES ON *.* TO 'root'@'localhost' identified by '666666';
ps:授权的时候,授权的主机、授权的用户必须与测试网页里面写的主机与用户的相同,才能进行连接到mysql,否则无法连接至mysql
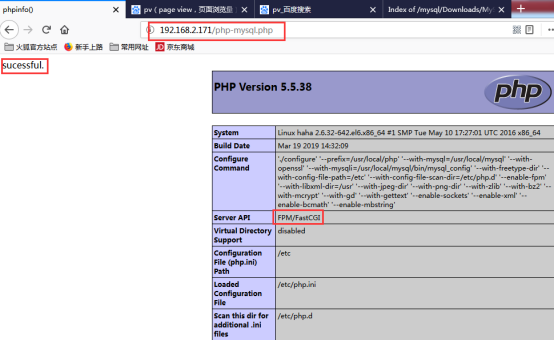
如果无法连接,可以打开php错误信息,然后一步一步的排查:
修改配置文件:
- /etc/php/7.0/fpm/php.ini
设置display_errors = On
- /etc/php/7.0/fpm/php-fpm.conf (或者:/usr/local/php/etc/php-fpm.d/www.conf)
设置php_flag[display_errors] = on
总结:如下几种方法也可以屏蔽错误回显信息:
1.php.ini的display_errors在php.ini文件中找到display_errors设置项,如果前面有分号,需要删去分号,并将值改为off
2.php.ini的error_reporting这个是修改错误级别显示,如果将级别设为最高等级的,则什么错误都不会显示在php.ini中找到error_reporting,去掉前面的分号(如果有),并将值改为0
3.使用ini_set函数配置此方法同方法1、2,只是在代码里面写,在无法修改php.ini的时候使用string ini_set ( string $varname , string $newvalue )ini_set('display_errors', '0');ini_set('error_reporting','0');
4.使用error_reporting函数int error_reporting ([ int $level ] )error_reporting(0); #关闭所有错误报告
5.使用@屏蔽单条语句的错误回显在需要屏蔽错误回显的语句前添加@符号
然后:
service nginx reload
就好了
php7的连接语法:
[root@LNMP html]# vim index.php
<?php
        $link = mysqli_connect('localhost','root','666666');
if ($link)
        echo "sucessful.";
else
        echo "failure.";
phpinfo();
?>

五、安装php加速器xcache
- 安装xcache
下载地址:http://xcache.lighttpd.net/pub/Releases/3.2.0/xcache-3.2.0.tar.gz
[root@test-6 php]# tar xf xcache-3.2.0.tar.gz

[root@test-6 php]# cd xcache-3.2.0

[root@test-6 xcache-3.2.0]# phpize    # 编译php模块
Configuring for:
PHP Api Version:         20121113
Zend Module Api No:      20121212
Zend Extension Api No:   220121212

[root@test-6 xcache-3.2.0]# ./configure --enable-xcache --with-php-config=/usr/local/php/bin/php-config  # 编译安装(关联php-config)

[root@test-6 xcache-3.2.0]# make && make install    # 安装,记录生成的文件路径
Installing shared extensions:     /usr/local/php/lib/php/extensions/no-debug-non-zts-20121212/

[root@test-6 xcache-3.2.0]# mkdir -pv /etc/php.d
[root@test-6 xcache-3.2.0]# cp xcache.ini /etc/php.d/xcache.ini
[root@test-6 xcache-3.2.0]# vim /etc/php.d/xcache.ini

;; this is an example, it won't work unless properly configured into php.ini
[xcache-common]
;; non-Windows example:
extension = /usr/local/php/lib/php/extensions/no-debug-non-zts-20121212/xcache.so    #修改该配置,变为绝对路径

[root@test-6 xcache-3.2.0]# service php-fpm restart    # 重启php-fpm 相关服务
Gracefully shutting down php-fpm . done
Starting php-fpm  done
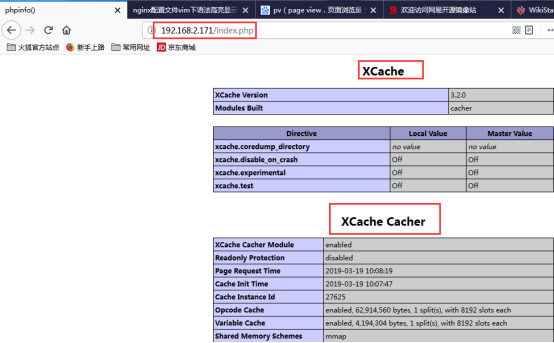
- 验证xcache 安装
六、安装phpMyAdmin-4.8.2 ,管理mysql
- 安装phpMyAdmin-4.8.2 ,支持php5.5- php 7.2 ,mysql-5.5 以上
下载地址:https://files.phpmyadmin.net/phpMyAdmin/4.8.2/phpMyAdmin-4.8.2-all-languages.tar.xz
[root@test-6 mysql]# wget https://files.phpmyadmin.net/phpMyAdmin/4.8.2/phpMyAdmin-4.8.2-all-languages.tar.xz
[root@test-6 mysql]# tar xf phpMyAdmin-4.8.2-all-languages.tar.xz
[root@test-6 mysql]# cp phpMyAdmin-4.8.2-all-languages /usr/local/nginx/html/phpadm
-
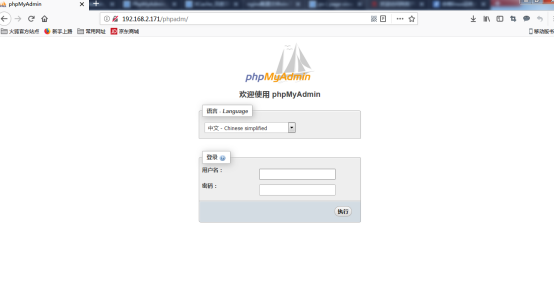
phpMyadmin 登录http://192.168.2.171/phpadm 验证
-
用户名
root -
密码为
数据库root密码
- 错误故障解决
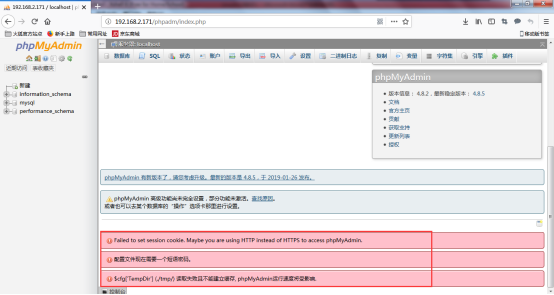
1) Failed to set session cookie. Maybe you are using HTTP instead of HTTPS to access phpMyAdmin.
@设置会话cookie失败。也许您正在使用HTTP而不是HTTPS访问phpMyAdmin。
用https登陆
2)配置文件现在需要一个短密码:
解决办法:设定 config.default.php 文件的108行$cfg['blowfish_secret']参数,参数字符串长度必须在32位以上。
[root@VM pmyadmin]# vim  libraries/config.default.php   # 在phpMyAdmin目录下libraries文件下的config.default.php
$cfg['blowfish_secret'] = 'asdfghjklzxcvbnm!@#$%^&*';

3)$cfg['TempDir'] (./tmp/) 读取失败且不能建立缓存, phpMyAdmin运行速度将受影响.
解决办法:手动在phpmyadmin的根目录建立tmp文件,并赋予777权限
[root@VM pmyadmin]# mkdir -m 777 tmp

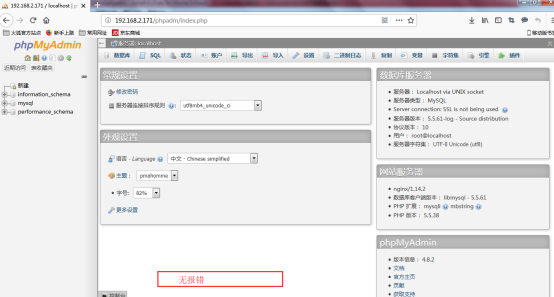
分布式的架构

如果fastcgi安装在其它主机上实现有是分布是的架构,如上图,对于php页面的处理需要修改,一共需要修改几个地方:
(1)修改nginx.conf文件如下:
location ~ \.php$ {
   root           html;
   fastcgi_pass   192.168.129.22:9000;
   fastcgi_index  index.php;
   fastcgi_param  SCRIPT_FILENAME  /opt/www/$fastcgi_script_name;
   include        fcgi.conf;
}
两处说明:一个是访问nginx,nginx把请求转发到fastcgi处理,但是php页面又是在fastcgi那台机器上的/opt/www目录中,所以需要修改以上两个地方才能实现php页面的解析。 (2)修改/usr/local/php/etc/php-fpm.conf文件 注:在安装fastcgi主机上:
<value name="listen_address">192.168.129.22:9000</value>
<value name="allowed_clients">192.168.129.21</value>
说明: 第一处监听本机的9000端口,默认是127.0.0.1,由于是分布式应用,需要修改。 第二处只允许nginx发来的请求给予解析,也需要修改
服务器分布
ip 设备
192.168.137.70 NGINX
192.168.137.60 PHP7.2
192.168.137.50 MYSQL5.7
1.安装mysql5.7(192.168.137.50)
1.1下载mysql
cd /usr/src/
wget https://downloads.mysql.com/archives/get/file/mysql-5.7.22-linux-glibc2.12-x86_64.tar.gz

1.2创建mysql的用户和组
groupadd -r -g 306 mysql
useradd -M -s /sbin/nologin -g 306 -u 306 mysql

1.3解压mysql包
tar xf mysql-5.7.22-linux-glibc2.12-x86_64.tar.gz -C /usr/local/
cd /usr/local/


ln -sv mysql-5.7.22-linux-glibc2.12-x86_64/ mysql     #创建软连接,方便后续升级
"mysql" -> "mysql-5.7.23-linux-glibc2.12-x86_64/"

ll | grep mysql
lrwxrwxrwx  1 root root  47 Nov  8 10:37 mysql -> /usr/local/mysql-5.7.22-linux-glibc2.12-x86_64/
drwxr-xr-x  9 root root 129 Nov  8 10:34 mysql-5.7.22-linux-glibc2.12-x86_64

1.4修改解压位置mysql文件的属主和组
chown -R mysql.mysql /usr/local/mysql
ll|grep mysql
lrwxrwxrwx  1 mysql mysql  36 Nov  8 10:44 mysql -> mysql-5.7.22-linux-glibc2.12-x86_64/
drwxr-xr-x  9 root  root  129 Nov  8 10:34 mysql-5.7.22-linux-glibc2.12-x86_64

1.5创建环境变量
echo 'export PATH=/usr/local/mysql/bin:$PATH' > /etc/profile.d/mysql.sh
. /etc/profile.d/mysql.sh
which mysql
/usr/local/mysql/bin/mysql


1.6建立数据存放目录并初始化
mkdir /opt/data
chown -R mysql.mysql /opt/data/
ll /opt/data/ -d
drwxr-xr-x 2 mysql mysql 6 Nov  8 10:50 /opt/data/

/usr/local/mysql/bin/mysqld --initialize --user=mysql --datadir=/opt/data/
2019-11-08T02:54:09.651769Z 0 [Warning] TIMESTAMP with implicit DEFAULT value is deprecated. Please use --explicit_defaults_for_timestamp server option (see documentation for more details).
2019-11-08T02:54:10.186527Z 0 [Warning] InnoDB: New log files created, LSN=45790
2019-11-08T02:54:10.226450Z 0 [Warning] InnoDB: Creating foreign key constraint system tables.
2019-11-08T02:54:10.288765Z 0 [Warning] No existing UUID has been found, so we assume that this is the first time that this server has been started. Generating a new UUID: 09d4c4ab-01d3-11ea-9add-000c29944549.
2019-11-08T02:54:10.289382Z 0 [Warning] Gtid table is not ready to be used. Table 'mysql.gtid_executed' cannot be opened.
2019-11-08T02:54:10.289764Z 1 [Note] A temporary password is generated for root@localhost: -Eq+Zfy;d84Z  #最后一行为随机密码


1.7配置mysql
ln -sv /usr/local/mysql/include/ /usr/local/include/mysql
"/usr/local/include/mysql" -> "/usr/local/mysql/include/"

ll !$
lrwxrwxrwx 1 root root 25 Nov  8 10:58 /usr/local/include/mysql -> /usr/local/mysql/include/

echo '/usr/local/mysql/lib' > /etc/ld.so.conf.d/mysql.conf
ldconfig -v


1.8生成配置文件
cat > /etc/my.cnf <<EOF
[mysqld]
basedir = /usr/local/mysql
datadir = /opt/data
socket = /tmp/mysql.sock
port = 3306
pid-file = /opt/data/mysql.pid
user = mysql
skip-name-resolve
EOF

# cat /etc/my.cnf
[mysqld]
basedir = /usr/local/mysql
datadir = /opt/data
socket = /tmp/mysql.sock
port = 3306
pid-file = /opt/data/mysql.pid
user = mysql
skip-name-resolve

配置服务启动脚本
cp -a /usr/local/mysql/support-files/mysql.server /etc/init.d/mysqld
# vim /etc/init.d/mysqld #修改这两行
basedir=/usr/local/mysql
datadir=/opt/data

1.10启动服务mysql
service mysqld start
Starting MySQL.Logging to '/opt/data/localhost.localdomain.err'.
 SUCCESS!

1.11修改密码
mysql -uroot -p
Enter password: #之前初始化生成的密码
mysql> show databases;
ERROR 1820 (HY000): You must reset your password using ALTER USER statement before executing this statement.
mysql> use mysql;
ERROR 1820 (HY000): You must reset your password using ALTER USER statement before executing this statement.    #这里不管操作什么都是不行的,必须修改root密码

mysql> set password = password('666666');
Query OK, 0 rows affected, 1 warning (0.00 sec)
mysql> flush privileges;                            #刷新数据库
2.安装php-7.2.8 (192.168.137.60)
2.1创建nginx用户
groupadd -r -g 955 nginx
useradd -M -s /sbin/nologin -g 955 -u 955 nginx
id nginx
uid=955(nginx) gid=955(nginx) 组=955(nginx)  #确保php和nginx的nginx用户的uid,gid,组id一致


2.2安装php依赖包
yum -y install epel-release gcc gcc-c++
yum -y install libxml2 libxml2-devel openssl openssl-devel bzip2 bzip2-devel libcurl libcurl-devel libjpeg libjpeg-devel libpng libpng-devel freetype freetype-devel gmp gmp-devel libmcrypt libmcrypt-devel readline readline-devel libxslt libxslt-devel mhash mhash-devel

2.3下载并解压安装php
cd /usr/src/
wget http://cn.php.net/distributions/php-7.2.8.tar.xz
tar xvf php-7.2.8.tar.xz
cd php-7.2.8/
./configure --prefix=/usr/local/php7 \
--with-config-file-path=/usr/local/php7/etc \
--with-config-file-scan-dir=/usr/local/php7/etc/php.d \
--with-mysql=mysqlnd \
--with-pdo-mysql=mysqlnd \
--with-mysqli=mysqlnd \
--enable-mysqlnd \
--with-openssl \
--enable-fpm \
--enable-sockets \
--enable-sysvshm \
--enable-mbstring \
--with-freetype-dir \
--with-jpeg-dir \
--with-png-dir \
--with-zlib \
--with-libxml-dir=/usr \
--enable-xml \
--with-mhash \
--with-mcrypt=/usr \
--with-bz2 \
--enable-maintainer-zts \
&& make && make install
-------------------------------------------------------------------
./configure  --prefix=/usr/local/php7 \
--with-config-file-path=/usr/local/php7/etc/ \
--with-config-file-scan-dir=/usr/local/php7/etc/conf.d \
--with-mysqli=mysqlnd  \
--with-pdo-mysql=mysqlnd \
--enable-mysqlnd \
--with-mysql-sock=/tmp/mysql.sock \
--with-fpm-user=nginx \
--with-fpm-group=nginx \
--with-iconv-dir \
--with-freetype-dir \
--with-jpeg-dir \
--with-png-dir \
--with-zlib \
--with-bz2 \
--with-libxml-dir \
--with-curl \
--with-gd \
--with-openssl \
--with-mhash  \
--with-xmlrpc \
--with-pdo-mysql \
--with-libmbfl \
--with-onig \
--with-pear \
--enable-xml \
--enable-bcmath \
--enable-shmop \
--enable-sysvsem \
--enable-inline-optimization \
--enable-mbregex \
--enable-fpm \
--enable-mbstring \
--enable-pcntl \
--enable-sockets \
--enable-zip \
--enable-soap \
--enable-opcache \
--enable-pdo \
--enable-mysqlnd-compression-support \
--enable-maintainer-zts  \
--enable-session \
--enable-ftp \
--enable-gd-native-ttf \
--with-mcrypt \
--with-xsl \
--enable-static=PKGS \
--with-gettext \
--enable-trans-sid

2.4配置环境变量
echo 'export PATH=/usr/local/php7/bin:$PATH' > /etc/profile.d/php7.sh
source /etc/profile.d/php7.sh
which php

2.5配置php-fpm
cp php.ini-production /usr/local/php7/etc/php.ini
cp sapi/fpm/init.d.php-fpm /etc/init.d/php-fpm
chmod +x /etc/rc.d/init.d/php-fpm
cd /usr/local/php7/etc/
ll
total 84
-rw-r--r-- 1 root root  1240 Nov  8 14:57 pear.conf
-rw-r--r-- 1 root root  4468 Nov  8 14:57 php-fpm.conf.default
drwxr-xr-x 2 root root    30 Nov  8 14:57 php-fpm.d
-rw-r--r-- 1 root root 70569 Nov  8 15:06 php.ini

cp php-fpm.conf.default php-fpm.conf
# tail !$
tailf php-fpm.conf
; used in logs and stats. There is no limitation on the number of pools which
; FPM can handle. Your system will tell you anyway :)

; Include one or more files. If glob(3) exists, it is used to include a bunch of
; files from a glob(3) pattern. This directive can be used everywhere in the
; file.
; Relative path can also be used. They will be prefixed by:
;  - the global prefix if it's been set (-p argument)
;  - /usr/local/php7 otherwise
include=/usr/local/php7/etc/php-fpm.d/*.conf


cd php-fpm.d/
cp www.conf.default www.conf

2.6修改php-fpm配置文件
cd ..
vim php-fpm.conf    #如果该配置文件不存在这些参数,那么就在php-fpm.d/www.conf
user = nginx
group = nginx
listen = 192.168.137.60:9000       #本机ip
pm.max_children = 50
pm.start_servers = 5
pm.min_spare_servers = 2
pm.max_spare_servers = 8

sbin]# ./php-fpm -t         #检查配置文件是否正确
[29-Jan-2021 22:41:22] NOTICE: configuration file /usr/local/php/etc/php-fpm.conf test is successful


2.7启动php-fpm
service php-fpm start
Starting php-fpm  done

# netstat -nutlp|grep 9000
tcp        0      0 192.168.137.60:9000     0.0.0.0:*               LISTEN      15756/php-fpm: mast
3.nginx安装与配置(192.168.137.70)
3.1创建nginx用户    确保php服务器上创建的nginx用户的uid,gid,组id一致
groupadd -r -g 955 nginx
useradd -M -s /sbin/nologin -g 955 -u 955 nginx
id nginx
uid=955(nginx) gid=955(nginx) groups=955(nginx)

3.2安装nginx依赖环境
yum -y install pcre-devel openssl openssl-devel gd-devel gcc gcc-c++
yum -y groupinstall 'Development Tools'


3.3建立nginx日志存放目录 --这里看情况,日志和pid文件放的位置有你觉得
mkdir -p /var/log/nginx
chown -R nginx.nginx /var/log/nginx/
ll /var/log/nginx/ -d
drwxr-xr-x 2 nginx nginx 6 Nov  8 15:38 /var/log/nginx/

3.4下载并安装nginx
cd /usr/src/
wget http://nginx.org/download/nginx-1.12.0.tar.gz
tar -xvf nginx-1.12.0.tar.gz
cd nginx-1.12.0/
./configure \
--prefix=/usr/local/nginx \
--user=nginx \
--group=nginx \
--with-debug \
--with-http_ssl_module \
--with-http_realip_module \
--with-http_image_filter_module \
--with-http_gunzip_module \
--with-http_gzip_static_module \
--with-http_stub_status_module \
--http-log-path=/var/log/nginx/access.log \
--error-log-path=/var/log/nginx/error.log \
--with-pcre \
--with-stream

Configuration summary
  + using system PCRE library
  + using system OpenSSL library
  + using system zlib library

  nginx path prefix: "/usr/local/nginx"
  nginx binary file: "/usr/local/nginx/sbin/nginx"
  nginx modules path: "/usr/local/nginx/modules"
  nginx configuration prefix: "/usr/local/nginx/conf"
  nginx configuration file: "/usr/local/nginx/conf/nginx.conf"
  nginx pid file: "/usr/local/nginx/logs/nginx.pid"
  nginx error log file: "/var/log/nginx/error.log"
  nginx http access log file: "/var/log/nginx/access.log"
  nginx http client request body temporary files: "client_body_temp"
  nginx http proxy temporary files: "proxy_temp"
  nginx http fastcgi temporary files: "fastcgi_temp"
  nginx http uwsgi temporary files: "uwsgi_temp"
  nginx http scgi temporary files: "scgi_temp"

make && make install

3.5配置nginx的环境变量
echo 'export PATH=/usr/local/nginx/sbin:$PATH' > /etc/profile.d/nginx.sh
. /etc/profile.d/nginx.sh
which nginx

nginx   #启动nginx
# ss -antl|grep :80
LISTEN     0      128          *:80                       *:*

3.6nginx的控制方式
# nginx -h
-t      检查配置文件语法
-v      输出nginx版本
-c      制定配置文件路径
-s      发送服务控制信号ํ{stop|quit|reopen|reload}

3.7配置nginx
cd /usr/local/nginx/conf/
vim nginx.conf
        #access_log  logs/host.access.log  main;

        location / {
            root   html;
            index  index.php index.html index.htm;    #在这里加上index.php
······
        location ~ \.php$ {
            root           html;
            fastcgi_pass   192.168.137.60:9000;    #php的ip地址
            fastcgi_index  index.php;
            fastcgi_param  SCRIPT_FILENAME  $document_root$fastcgi_script_name;
            include        fastcgi_params;       去掉这几行前面的#号
        }
注意:如果php和nginx不在一台。那么php代码就要放在php服务器上面。那么nginx处理静态页面的代码就要放在nginx服务器上面。 php服务器上面的代码路径在nginx配置文件里面指定的,且必须路径要一样,否则找不到文件
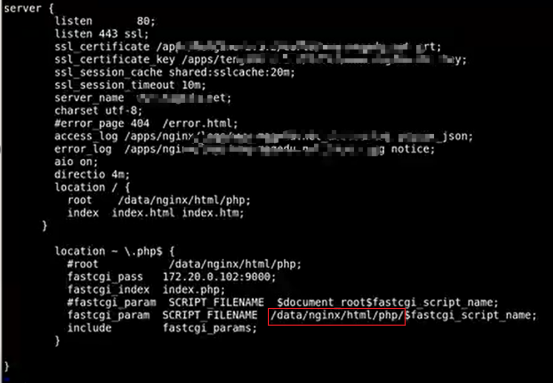
这个是把php代码目录写死的,放在
/data/nginx/html/php/下面
4.查看效果
这里必须在php、nginx创建相同的页面才能加载,因为nginx、php不在一台服务器上。因此这里就可以部署文件共享服务器了
4.1 创建html(192.168.137.60)(为什么要创建/usr/local/nginx/html/,因为nginx配置的是$document_root那么在php那台服务器上面就需要创建与nginx的root路径一样的代码目录)
mkdir -p /usr/local/nginx/html/
chown -R nginx.nginx /usr/local/nginx/html/
cd /usr/local/nginx/html/
vim index.php
<?php
        $link = mysqli_connect('192.168.137.50','root','666666');
if ($link)
        echo "sucessful.";
else
        echo "failure.";
phpinfo();
?>
4.2 创建html(192.168.137.70)
cd /usr/local/nginx/html
vim index.php
<?php
        $link = mysqli_connect('192.168.137.50','root','666666');
if ($link)
        echo "sucessful.";
else
        echo "failure.";
phpinfo();
?>
说明:192.168.137.50为数据库的IP地址
4.3重载nginx的配置文件和重启php服务
[root@localhost ~]# nginx -s reload
[root@localhost ~]# service php-fpm restart
4.4登录网页
192.168.137.70

5.mysql配置+wordpress
5.1数据库服务器上创建wordpress数据库及授权帐户(192.168.137.50)
mysql -uroot -p
mysql> create database wordpress;
Query OK, 1 row affected (0.00 sec)
mysql> grant all on wordpress.* to root@'%' identified by '666666';
Query OK, 0 rows affected, 1 warning (0.00 sec)
mysql> flush privileges ;
Query OK, 0 rows affected (0.00 sec)


5.2下载wordpress并解压到nginx的服务器
cd /usr/src/
wget https://wordpress.org/latest.tar.gz
tar zxf latest.tar.gz
cp -rf wordpress /usr/local/nginx/html/

5.3下载wordpress并解压到PHP的服务器
cd /usr/src/
wget https://wordpress.org/latest.tar.gz
tar zxf latest.tar.gz
cp -rf wordpress /usr/local/nginx/html/

5.4修改wordpress
cd /usr/local/nginx/html/wordpress/
cp wp-config-sample.php wp-config.php
vim wp-config.php
#更改的内容
// ** MySQL settings - You can get this info from your web host ** //
/** The name of the database for WordPress */
define( 'DB_NAME', 'wordpress' );

/** MySQL database username */
define( 'DB_USER', 'root' );

/** MySQL database password */
define( 'DB_PASSWORD', '666666' );

/** MySQL hostname */
define( 'DB_HOST', '192.168.137.50' );

/** Database Charset to use in creating database tables. */
define( 'DB_CHARSET', 'utf8' );

/** The Database Collate type. Don't change this if in doubt. */
define( 'DB_COLLATE', '' );

文件末尾添加:加不加都无所谓
require_once(ABSPATH . 'wp-settings.php');

define("FS_METHOD","direct");

define("FS_CHMOD_DIR", 0777);

define("FS_CHMOD_FILE", 0777);

5.4测试访问
http://192.168.137.70/wordpress
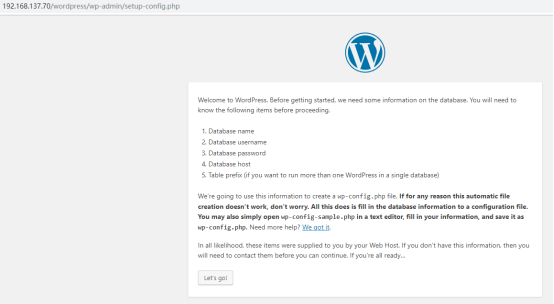
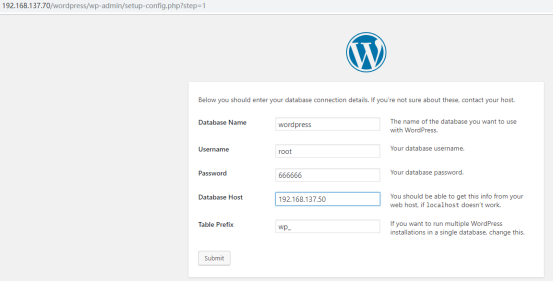

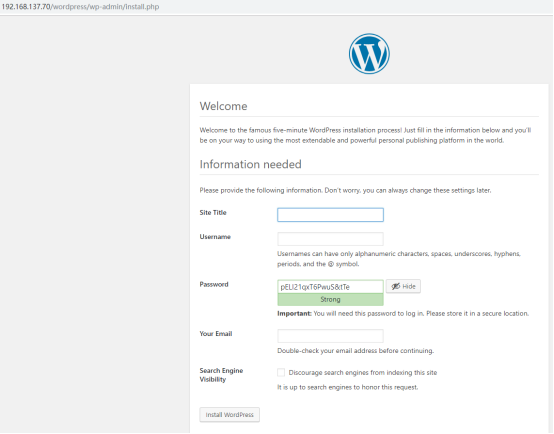
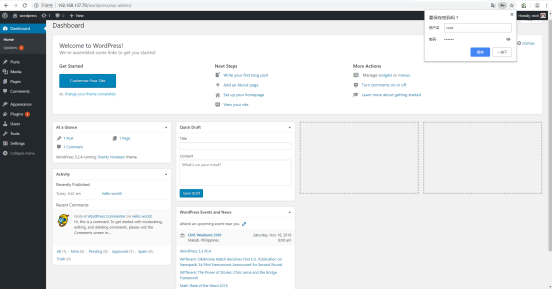
重新加载:

免责声明: 本文部分内容转自网络文章,转载此文章仅为个人收藏,分享知识,如有侵权,请联系博主进行删除。