OpenResty搭建高性能服务端
官网:http://openresty.org/cn/
参考:https://www.jianshu.com/p/09c17230e1ae
https://www.bookstack.cn/read/openresty-best-practices/lua-operator.md
部署openresty
https://mp.weixin.qq.com/s/fLaNHRCCA6rjYNdS3ww6IA


1.安装依赖开发组件
-
pcre-devel:扩展的正则表达式引擎,为了使Nginx处理更复杂的正则表达式机制
-
openssl-devel:
--with-http_ssl_module使用该模块必需装openssl库,来实现http支持https协议 -
zlib-devel:zlib库是网络通信压缩库,ngx_http_gzip_module(gzip压缩模块)所必需的
-
readline-devel:readline是安装Openresty所必须的依赖包
yum install gcc-c++ libtool gmake make -y
yum install pcre pcre-devel openssl openssl-devel zlib zlib-devel readline readline-devel -y
2.创建nginx用户组 Nginx的Master主进程以root用户身份运行,而worker子进程我们指定它为nginx用户运行
groupadd -r nginx
useradd -r -M -g nginx -c "create-time is `date +%Y/%m/%d`;is web service" -s /sbin/nologin nginx
3.下载编译并安装Openresty
wget https://openresty.org/download/openresty-1.17.8.2.tar.gz
tar xf openresty-1.17.8.2.tar.gz
cd openresty-1.17.8.2
./configure \
--prefix=/usr/local/openresty \
--sbin-path=/usr/local/openresty/nginx/sbin/nginx \
--conf-path=/usr/local/openresty/nginx/conf/nginx.conf \
--pid-path=/usr/local/openresty/nginx/logs/nginx.pid \
--error-log-path=/usr/local/openresty/nginx/logs/error.log \
--http-log-path=/usr/local/openresty/nginx/logs/access.log \
--user=nginx \
--group=nginx \
--with-pcre \
--with-pcre-jit \
--with-stream \
--with-threads \
--with-file-aio \
--with-luajit \
--with-http_v2_module \
--with-http_ssl_module \
--with-http_realip_module \
--with-http_gzip_static_module \
--with-http_stub_status_module

# gmake && gmake install

# tree -L 1 /usr/local/openresty/
/usr/local/openresty/
├── bin
├── COPYRIGHT
├── luajit
├── lualib
├── nginx
├── pod
├── resty.index
└── site

9 directories, 2 files
4.为Openresty添加环境变量
echo 'export PATH=/usr/local/openresty/bin:$PATH' > /etc/profile.d/openresty.sh
5.添加location配置确认结合了Nginx与Lua的Openresty部署成功
       location /hello {
            default_type text/html;
            content_by_lua_block {
                ngx.say("HelloWorld")       -- 通过调用lua来打印HelloWorld
            }
        }

上面已经实现了Openresty的部署
Openresty实现WAF防火墙功能
https://mp.weixin.qq.com/s/fLaNHRCCA6rjYNdS3ww6IA
https://article.itxueyuan.com/nWoopn
https://www.jianshu.com/p/bffbd9bc4c53
http://f2ex.cn/nginx-installed-configuration-naxsi-waf/
什么是WAF和DDOS
Web应用防护系统(也称为:网站应用级入侵防御系统。英文:Web Application Firewall,简称:WAF)。利用国际上公认的一种说法:Web应用防火墙是通过执行一系列针对HTTP/HTTPS的安全策略来专门为Web应用提供保护的一款产品
DDos的全称是Distributed Denial of service主要依靠一组计算机来发起对一个单一的目标系统的请求,从而造成目标系统资源耗尽而拒绝正常的请求
根据OSI网络模型,最常见的DDos有三类,第三层(网络层)DDos、第四层(传输层)DDos和第七层(应用层)DDos
WAF主要处理第七层DDos攻击,它在处理第七层DDos攻击时会比其它防护手段更高效一些,WAF会对HTTP流量做详细的分析,这样WAF就能针对正常的访问请求进行建模,然后使用这些模型来区分正常的请求和攻击者使用机器人或者脚本触发的请求。
实现WAF
实现WAF的方式有两种:
- 使用
nginx+lua来实现WAF,须在编译nginx的时候配置上lua - 部署OpenResty,不需要在编译nginx的时候指定lua
这里我们采用的是第二种
WAF一句话描述,就是解析HTTP请求(协议解析模块),规则检测(规则模块),做不同的防御动作(动作模块),并将防御过程(日志模块)记录下来。所以本文中的WAF的实现由五个模块(配置模块、协议解析模块、规则模块、动作模块、错误处理模块)组成
WAF的功能
- 支持IP白名单和黑名单功能,直接将黑名单的IP访问拒绝。
-
支持URL白名单,将不需要过滤的URL进行定义。
-
支持User-Agent的过滤,匹配自定义规则中的条目,然后进行处理(返回403)。
- 支持CC攻击防护,单个URL指定时间的访问次数,超过设定值,直接返回403。
-
支持Cookie过滤,匹配自定义规则中的条目,然后进行处理(返回403)。
-
支持URL过滤,匹配自定义规则中的条目,如果用户请求的URL包含这些,返回403。
-
支持URL参数过滤,原理同上。
-
持日志记录,将所有拒绝的操作,记录到日志中去。
- 日志记录为JSON格式,便于日志分析,例如使用ELKStack进行攻击日志收集、存储、搜索和展示
部署WAF
WAF已经有人通过lua写出了这个开源的功能,在此直接拿来用即可。GitHub地址:https://github.com/unixhot/waf
1.下载waf模块
git clone https://github.com/unixhot/waf.git
cp -a ./waf/waf /usr/local/openresty/nginx/conf/
2.waf文件介绍
# ls -lrth /usr/local/openresty/nginx/conf/waf/
total 20K
-rw-r--r-- 1 root root 2.3K Nov  6 19:23 lib.lua
-rw-r--r-- 1 root root 5.4K Nov  6 19:23 init.lua
-rw-r--r-- 1 root root 1.3K Nov  6 19:23 config.lua
-rw-r--r-- 1 root root  408 Nov  6 19:23 access.lua
drwxr-xr-x 2 root root  158 Nov  6 19:23 rule-config
以上access.lua、lib.lua、init.lua都是功能实现的lua代码,如果不具备lua的开发能力,我们一般不会去进行改动 config.lua为各个功能的配置文件, rule-config目录存放了各种防御策略规则;我们需要经常改动config.lua和存储策略的文件
# ls -rlth /usr/local/openresty/nginx/conf/waf/rule-config/
total 24K
-rw-r--r-- 1 root root   0 Nov  6 19:23 whiteip.rule
-rw-r--r-- 1 root root 173 Nov  6 19:23 useragent.rule
-rw-r--r-- 1 root root 307 Nov  6 19:23 url.rule
-rw-r--r-- 1 root root 739 Nov  6 19:23 post.rule
-rw-r--r-- 1 root root 652 Nov  6 19:23 cookie.rule
-rw-r--r-- 1 root root   0 Nov  6 19:23 blackip.rule
-rw-r--r-- 1 root root 749 Nov  6 19:23 args.rule
-rw-r--r-- 1 root root   6 Nov  6 19:23 whiteurl.rule

Openresty引入WAF模块
1.修改nginx配置来引入WAF模块
如下在Nginx中加入以下配置来引入WAF模块
vim /usr/local/openresty/nginx/conf/nginx.conf
...
http { #在http模块下面添加下面参数
    lua_shared_dict limit 10m;
    lua_package_path "/usr/local/openresty/nginx/conf/waf/?.lua";
    init_by_lua_file "/usr/local/openresty/nginx/conf/waf/init.lua";
    access_by_lua_file "/usr/local/openresty/nginx/conf/waf/access.lua";
    ...
}
2.重启Openrestyd
# ./nginx/sbin/nginx -t  #检查配置文件是否正确
nginx: the configuration file /usr/local/openresty/nginx/conf/nginx.conf syntax is ok
nginx: configuration file /usr/local/openresty/nginx/conf/nginx.conf test is successful
# ./nginx/sbin/nginx -s reload  #重载openresty
3.查看nginx error.log 警告如下:failed to load the 'resty.core' module 加载 resty.core 核心模块失败,然后下面还有十几行找不到文件的日志
# cat /usr/local/openresty/nginx/logs/error.log
2020/11/07 20:15:13 [notice] 6768#6768: signal process started
2020/11/07 20:21:15 [notice] 7222#7222: signal process started
2020/11/07 20:21:16 [notice] 7224#7224: signal process started
2020/11/07 20:28:04 [notice] 7647#7647: signal process started
2020/11/07 20:28:04 [alert] 6434#6434: failed to load the 'resty.core' module (https://github.com/openresty/lua-resty-core); ensure you are using an OpenResty release from https://openresty.org/en/download.html (reason: module 'resty.core' not found:
    no field package.preload['resty.core']
    no file '/usr/local/openresty/nginx/conf/waf/resty/core.lua'
    no file '/usr/local/openresty/site/lualib/resty/core.so'
    no file '/usr/local/openresty/lualib/resty/core.so'
    no file './resty/core.so'
    no file '/usr/local/lib/lua/5.1/resty/core.so'
    no file '/usr/local/openresty/luajit/lib/lua/5.1/resty/core.so'
    no file '/usr/local/lib/lua/5.1/loadall.so'
    no file '/usr/local/openresty/site/lualib/resty.so'
    no file '/usr/local/openresty/lualib/resty.so'
    no file './resty.so'
    no file '/usr/local/lib/lua/5.1/resty.so'
    no file '/usr/local/openresty/luajit/lib/lua/5.1/resty.so'
    no file '/usr/local/lib/lua/5.1/loadall.so') in /usr/local/openresty/nginx/conf/nginx.conf:124
4.解决办法如下 上面告警是缺少lua-resty-core模块,从而找不到这些信息,所以我们要下载lua-resty-core模块然后引入到Openresty
参考:https://github.com/openresty/lua-resty-core/tree/v0.1.19
解决上述报错:错误原因是找不到lualib库和resty模块,默认到/usr/local/lib/ 去找lualib,然而在编译安装OpenResty时lualib库默认放到/usr/local/openresty/lualib
方案一:方案一适用于原生nginx、tengine、Openresty
#下载lua-resty-core
cd /usr/local/openresty
git clone https://github.com/openresty/lua-resty-core.git
cd /usr/local/openresty/lua-resty-core
git status
git branch
git log
git checkout b7d0a681bb41e6e3f29e8ddc438ef26fd819bb19
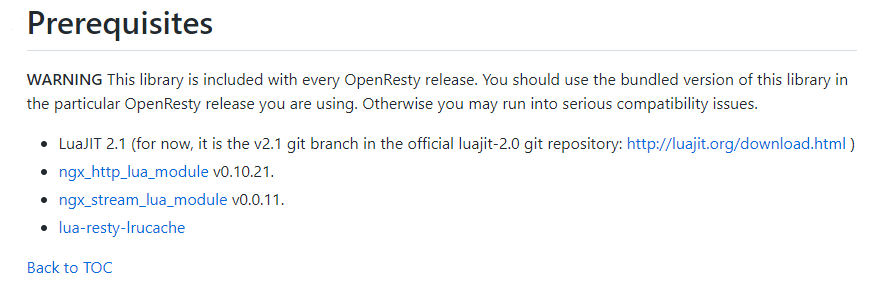
lua-resty-core与ngx_http_lua_module必须要版本对应,否则会出现如下错误:


lua-resty-core-v0.1.19对应ngx_http_lua_module v0.10.16 or v0.10.17.

lua-resty-core-v0.1.23对应ngx_http_lua_module v0.10.21.
然后修改nginx配置文件来引入此模块/usr/local/openresty/lua-resty-core/lib/?.lua;;,如下格式添加到第二行的后面
    lua_shared_dict limit 10m;
    lua_package_path "/usr/local/openresty/nginx/conf/waf/?.lua;/usr/local/openresty/lua-resty-core/lib/?.lua;;";
    init_by_lua_file "/usr/local/openresty/nginx/conf/waf/init.lua";
    access_by_lua_file "/usr/local/openresty/nginx/conf/waf/access.lua";
方案二:比较适用Openresty
因为编译安装OpenResty时lualib库默认放到/usr/local/openresty/lualib,那么我们就修改nginx配置文件来引入此模块/usr/local/openresty/lualib/?.lua;;,如下格式添加到第二行的后面
    lua_shared_dict limit 10m;
    lua_package_path "/usr/local/openresty/nginx/conf/waf/?.lua;/usr/local/openresty/lualib/?.lua;;";
    init_by_lua_file "/usr/local/openresty/nginx/conf/waf/init.lua";
    access_by_lua_file "/usr/local/openresty/nginx/conf/waf/access.lua";
方案三:没有成功
$ ln -s /usr/local/openresty/lualib /usr/local/lib/lua
$ ln -s /usr/local/openresty/lualib/resty /usr/local/openresty/nginx/conf/waf/resty
5.然后保存退出重启看日志
# ./nginx/sbin/nginx -t
nginx: the configuration file /usr/local/openresty/nginx/conf/nginx.conf syntax is ok
nginx: configuration file /usr/local/openresty/nginx/conf/nginx.conf test is successful
# ./nginx/sbin/nginx -s reload
确保日志无异常后则成功引入WAF模块
WAF模块配置文件详解
参考tengine+lua
IP黑名单配置
参考tengine+lua
OpenResty + redis实现灰度发布
https://www.cnblogs.com/ph7seven/p/9941189.html
https://www.cnblogs.com/Eivll0m/p/6774622.html
http://www.dczou.com/viemall/873.html
https://www.jianshu.com/p/5167325edb09

OpenResty + Redis 实现 IP 限流
参考:
https://www.cnblogs.com/zyy1688/p/10985565.html
http://bbs.linuxtone.org/thread-22666-1-1.html
https://www.jianshu.com/p/5f9928c7d730